1. Intro
1.1 First Impressions:
A first impression is the psychological process when humans see a new face for the first time. Within 100 mili-seconds, we form subconscious opinions about others, such as attractive, trustworthy, competent, and many more. Studies in psychology have shown that first impressions are formed largely based on patterns in facial features. First impressions have an impact in our lives and can influence the way other people interact with us. Once a first impression is made, it is difficult to reverse, and plays an important part in all social interactions.
1.2 Social Relevance of Treatments:
Using FaceReality, practitioners are able to perform aesthetic treatments that impact their patient’s first impression. By changing a patient’s appearance we are able to fundamentally change how others interact with them. Using this knowledge allows practitioners to perform treatments that are socially relevant, and have a real impact on the lives of our patients.
2. Features
2.1 Survey:
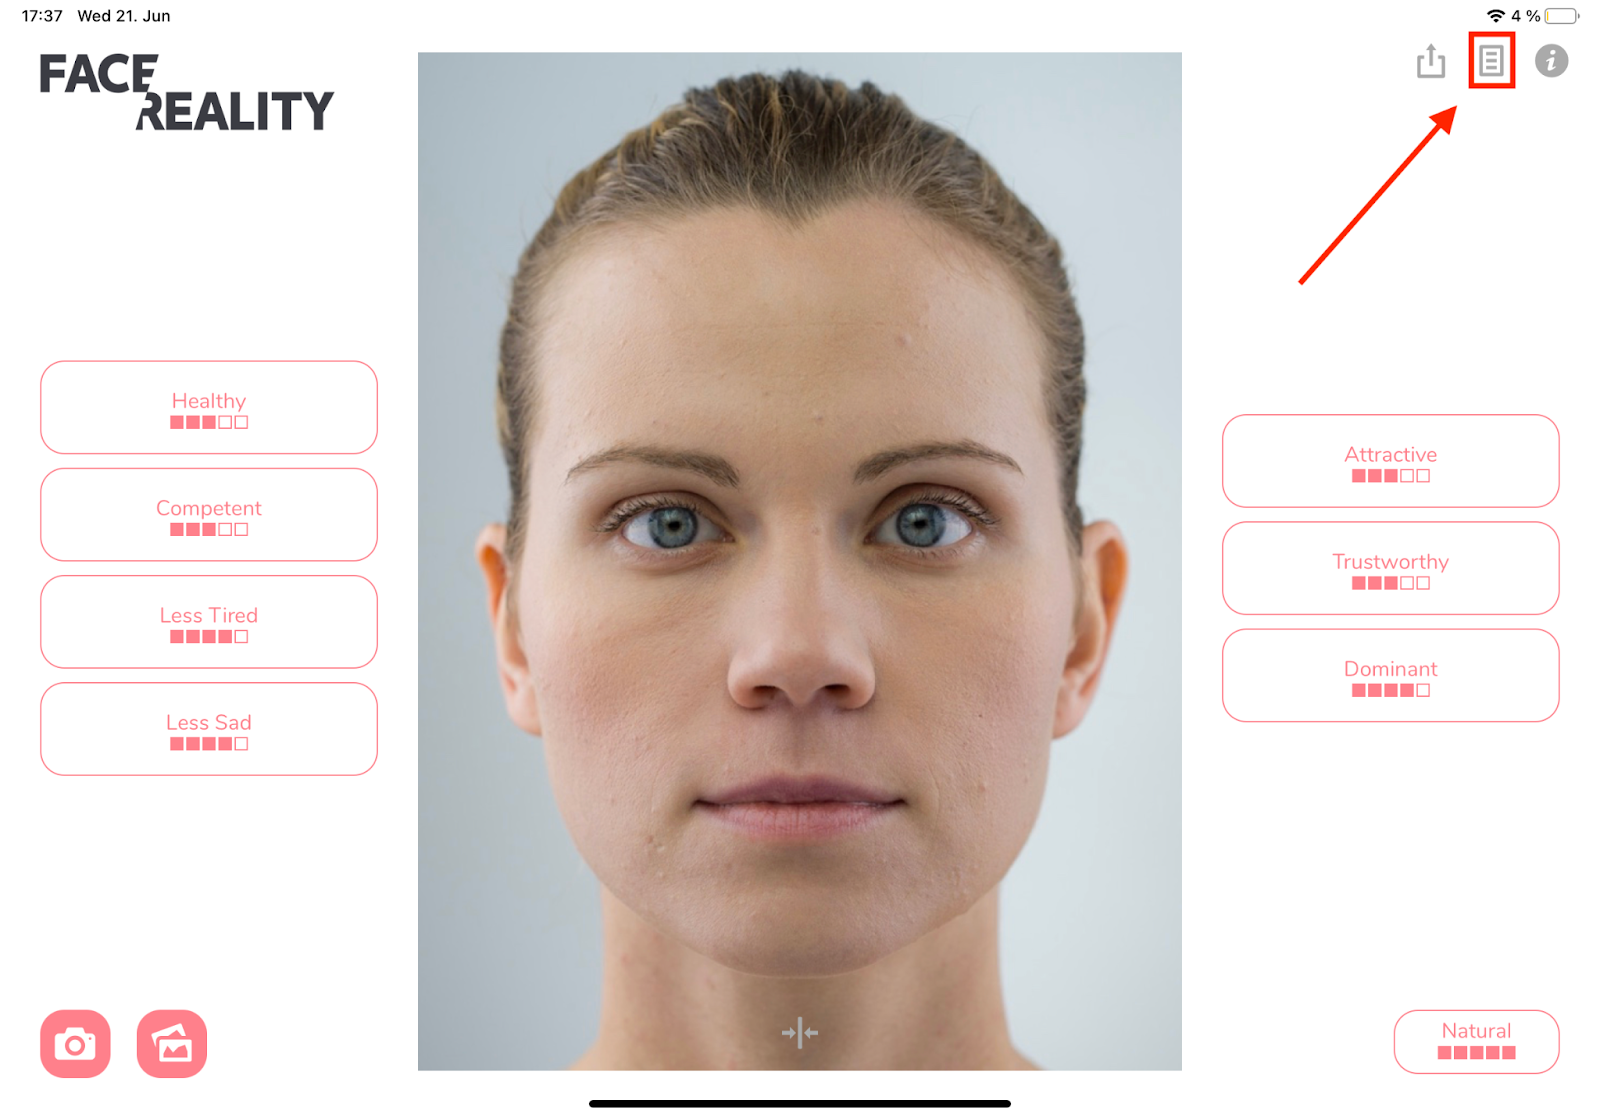
2.1.2 Accessing the Survey:
We have included a button to access the survey before and after the consultation.
Survey button location:
2.1.1 Using the Survey:
The purpose of the survey is to collect data regarding the impact of the application on the patient consultation, the resulting satisfaction and their purchase behavior.
The survey is divided into two sections. The first section should be filled out by the patient prior to the consultation. This allows us to collect data regarding the patient’s treatment requests upon entering the consultation. It is important that the patient has not been influenced.
The second section is to be filled out by the HCP after the consultation and serves to collect data regarding the impact the consultation and FaceReality have had on the satisfaction and purchasing behavior of the patient.
Throughout the survey, data points are collected through multiple choice questions.
Example of a multiple choice question:

Additionally you will find fields which require you to upload patient images. These can be loaded from the IPads library or taken directly from the upload field. Please note that a patient must consent to uploading and storing their image for the sole purpose of this investigation.
Example of a file upload field:

To differentiate between the control and treatment group, a question is included regarding the use of FaceReality. Depending on your answer to this questions, the survey will automatically direct you to the appropriate set of following questions.
FaceReality usage question::

2.2 Taking or Loading a Patient Photo:
The first step of any consultation is obtaining a picture of the patient for the appearance analysis and treatment recommendations. FaceReality provides two options for this: Either an image taken with the iPad camera, or an upload from the IPad’s local image library.
On the left bottom of the screen, you will find two buttons, to access the 

Camera & Photo Library Buttons location:

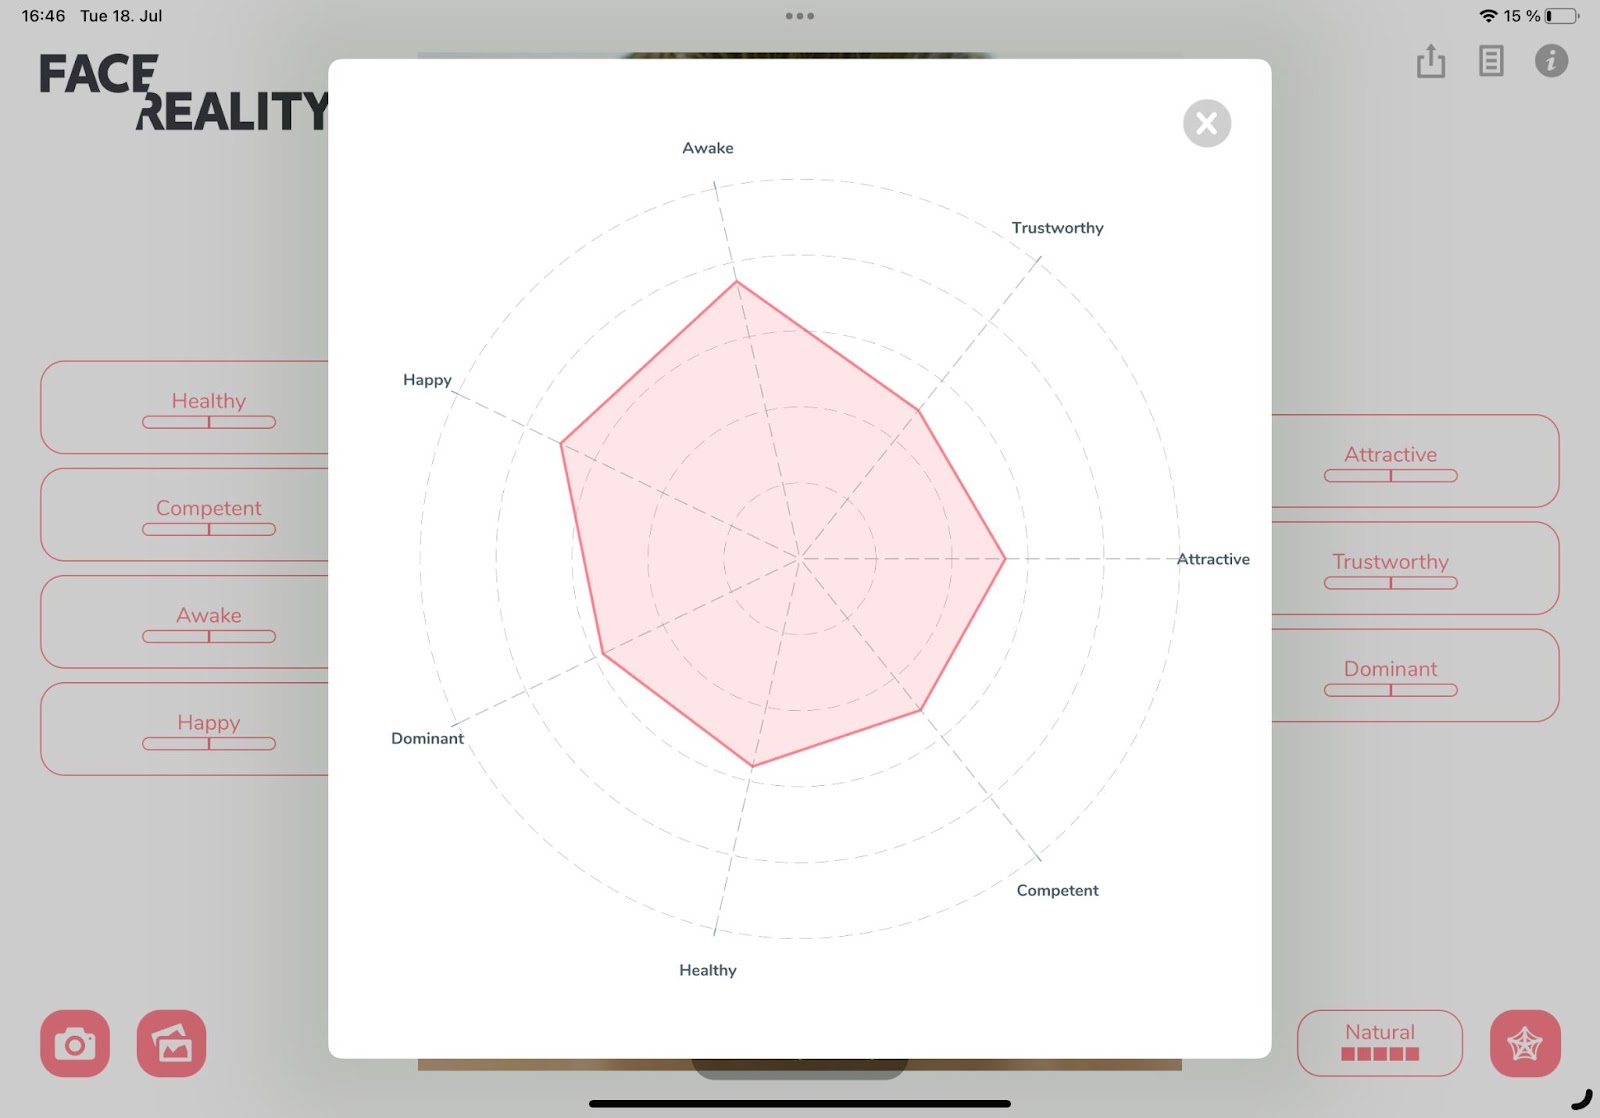
2.3 Initial Appearance Analysis:
Upon taking or loading an image, the algorithm will automatically analyze the face according to the different characteristics. The patient’s trait scores are displayed as a spider web to compare and interpret the different traits. The further from the center, the higher the score for that trait. This initial analysis gives the patient an understanding of how they are currently perceived by others and helps identify areas of improvement.
Spiderweb portraying appearance analysis:
2.4 Treatment Simulation:
The main component of the FaceReality simulation are the treatment recommendations according to a patient’s desired characteristic. There are seven traits available for a patient to choose from:
- Attractive
- Trustworthy
- Dominant
- Healthy
- Competent
- Awake
- Happy
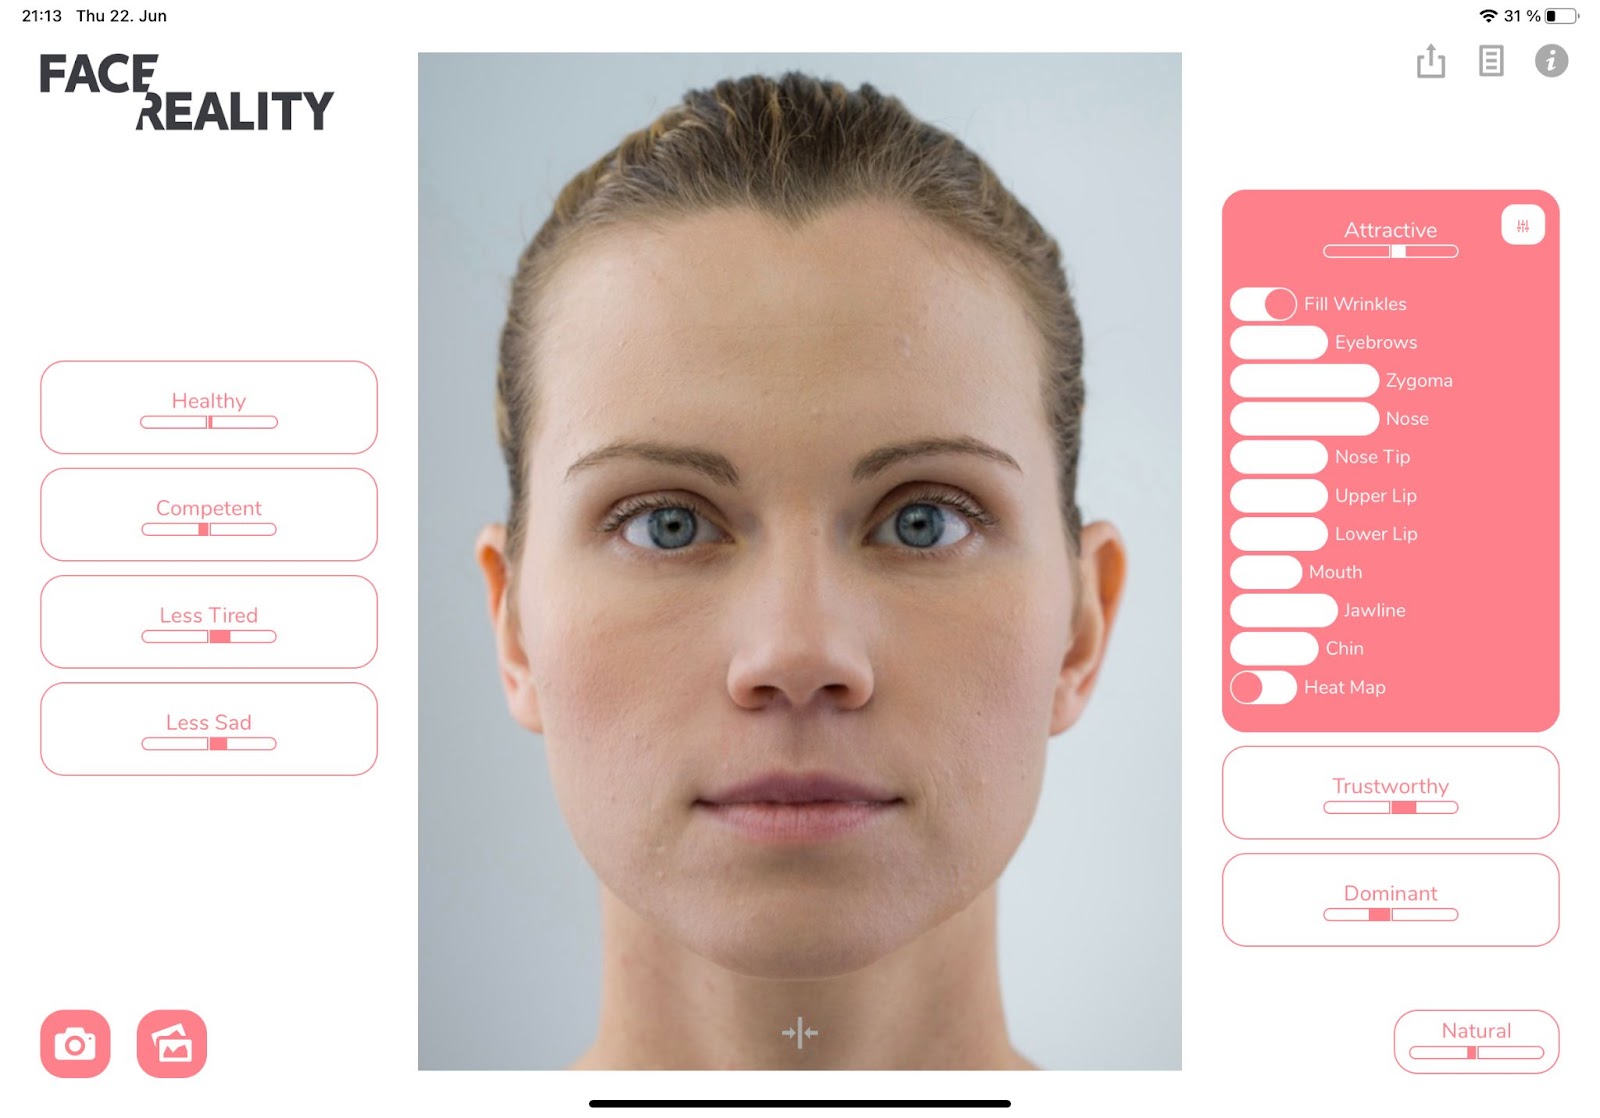
Every simulation recommends different treatments which optimize the patient towards the chosen characteristic. These changes are always achievable through minimally invasive treatments. The patented FaceReality algorithm automatically finds the best combination of changes to facial features. To start the simulation click on any of the seven traits in the side panels.
Simulation, Trait selection:

Once a trait has been selected the frame will expand and all of the simulated changes to facial features will become visible.
Selected trait & simulated treatments to image:
To return to the original image and remove the simulation, simply click on the selected area again, and it will return to a white color.
2.4.1 Personalisation Sliders:
Once the algorithm has calculated the optimum, the degree of change in each specific area is indicated by the corresponding slider. Should the patient wish to personalize the treatments, they can move the sliders to increase or decrease the degree of change.

2.4.2 Optimum Button
If you would like to return to the optimum determined by our algorithm, use the optimum 
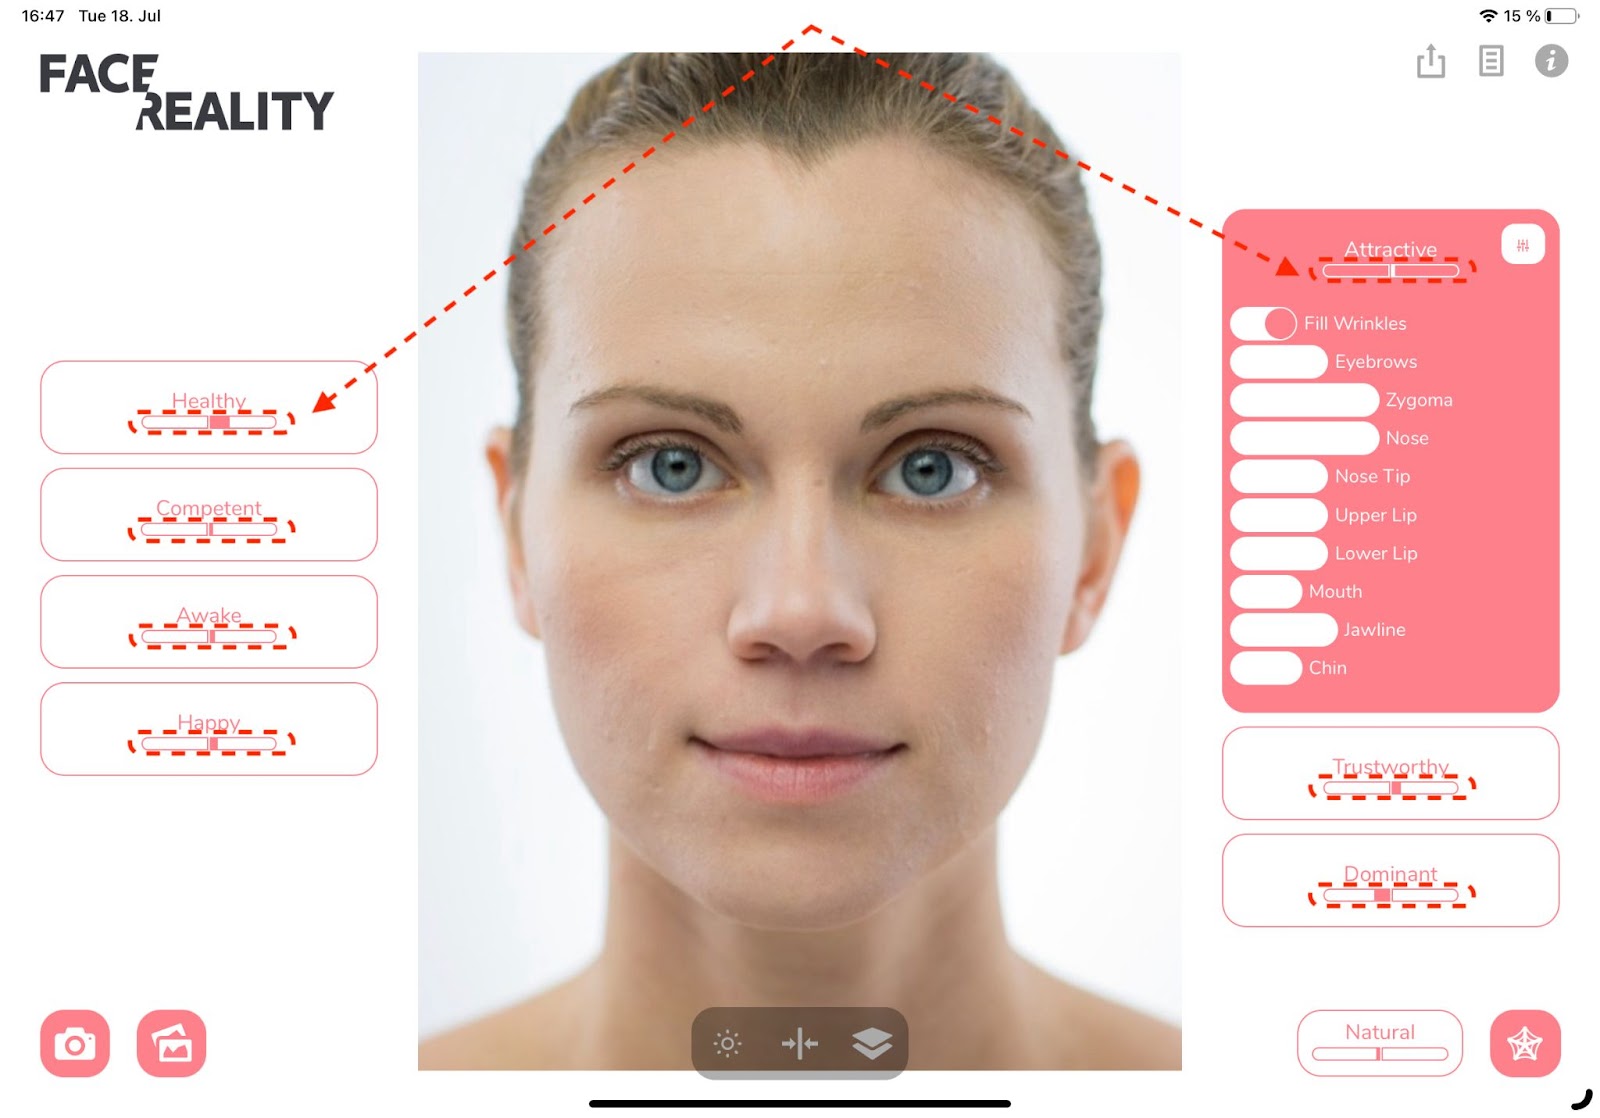
2.4.3 Real-time appearance Indicators
The real-time appearance indicators located underneath the trait, indicate the impact of the selected treatments. These indicators give an overview of how the changes impact the appearance of the patient. While a bar right of the center indicates an improvement in the specific trait, a bar left indicates a decrease. The distance from the center indicates the degree of change. These indicators allow for practitioners and patients to personalize their appearance
Live change in appearance indicators:
2.4.4 Naturalness indicator
The naturalness indicator measures how likely a viewer is to believe that the subject has undertaken cosmetic interventions. Therefore a measure of how natural a viewer would view this face. To activate the indicator, press on the bottom right button displaying the leaf. As soon as the button is activated, a bar will appear similar to the live scoring bars. The middle line indicates the baseline calculated from the patient’s initial image. As soon as simulations are activated, a move towards the right indicates a positive change and a move towards the left indicates a negative change in the naturalness of the patient.
Naturalness indicator activated:

2.5 Modes of Visualization:
In order to visualize the changes to your patient, FaceReality includes several different modes of comparison. All of these buttons can be found at the center bottom of the image.
- Before/After Slider
- Blink Mode
- Heat Map
2.5.1 Before/After Indicator
Regardless of the mode of comparison, this indicator shows whether you are currently viewing the original image or the simulation. The text “Simulation Only” serves as the indication whether you are currently viewing a simulation or the original image.
Before/After Indicator activated:

2.5.2 Before/After Slider:
The middle button activates the slider. When activated, the button will turn pink, and a white line will appear down the center of the image. By moving this line horizontally, you can compare the original image to the simulation. It is possible to transition between the before and after images. The left side of the line displays the original image, while the right side displays the simulation. To deactivate the slider, press on the button again. Once the button has turned back to white, the visualization is turned off.
Before/After slider activated:

2.5.3 Blink Mode:
This mode transitions between the before and after image (Blink). It provides patients and practitioners with a full-face view of the simulated changes.
When the button turns pink, the blink mode is activated. To deactivate it, simply press the button again.
Blink mode activated:

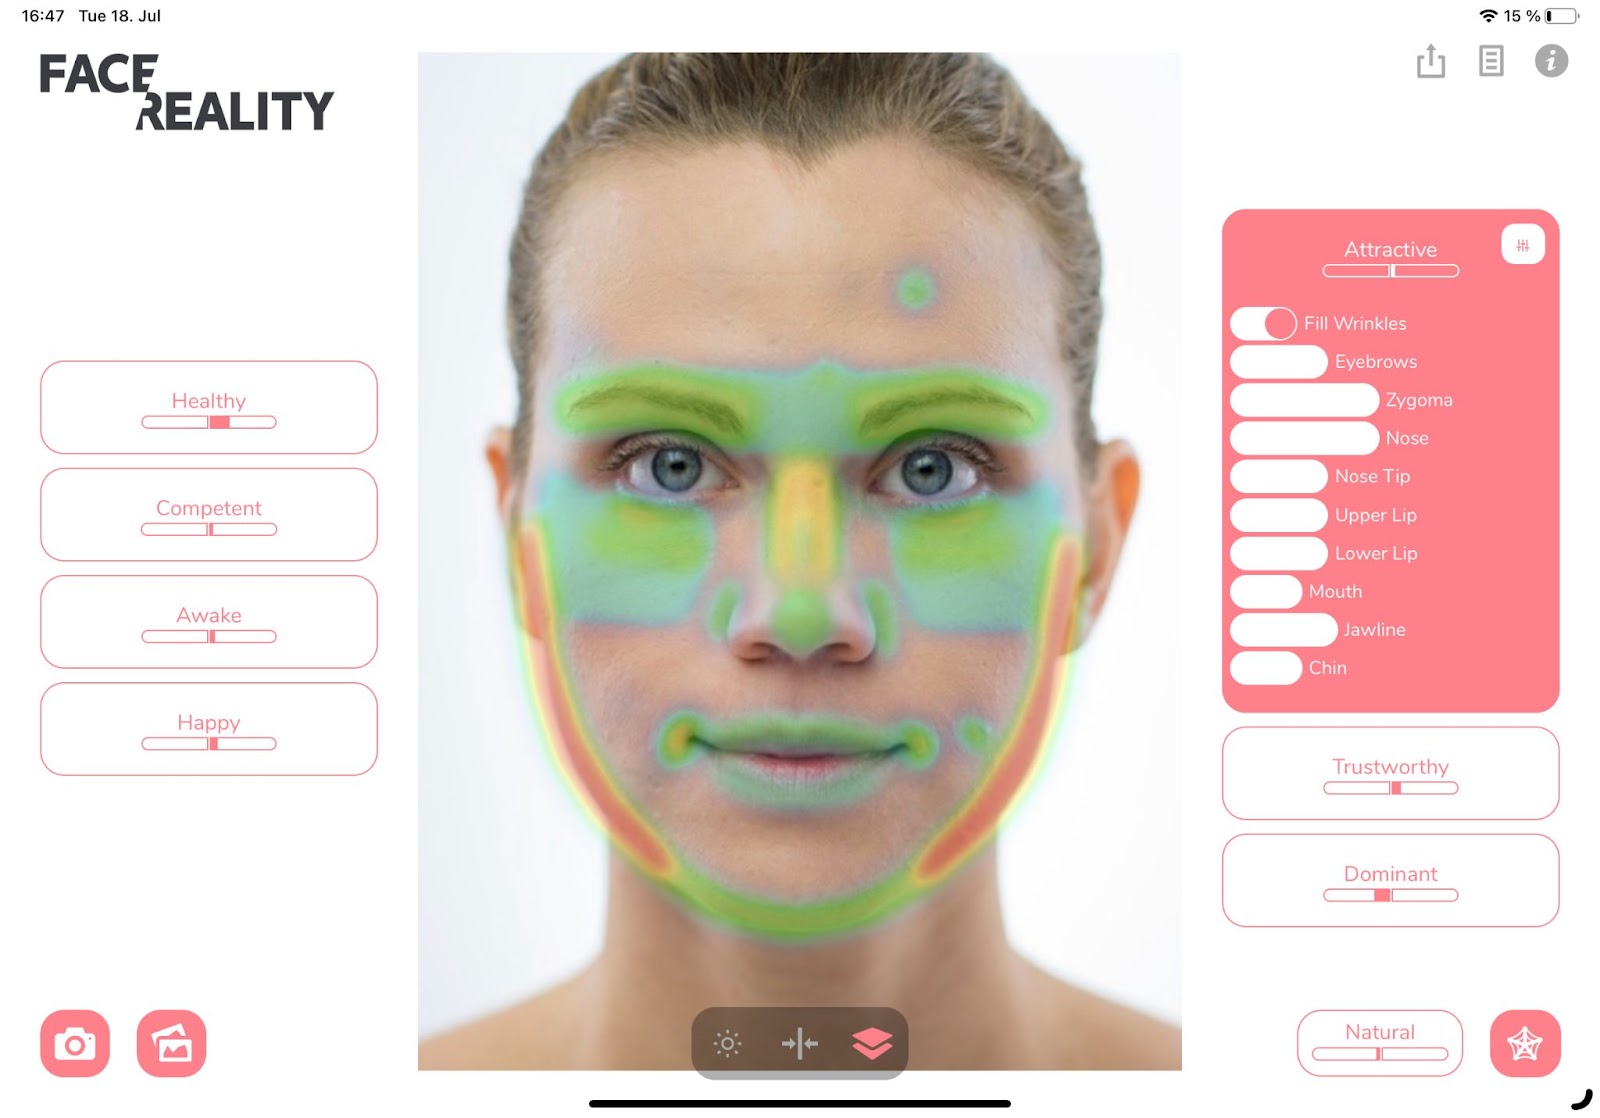
2.5.4 Heat Map:
The heat map displays the changes that have taken place as well as the degree of change of the single treatment areas. This visualization provides practitioners with a more detailed understanding of what changes are required in order to achieve the desired appearance. The degree of change is presented through different colors, where blue represents the least change and red represents the most change.
When the button turns pink, the heat map is activated. To deactivate it, simply press the button again.
Heatmap activated:
2.6 Export:
Finally the export function allows you to share your results with your patient. By pressing on the button in the top right corner, the Apple share function is opened, allowing you to share the visualization via all available mediums. Additionally, this allows you or your patient to share the results on social media, giving you more visibility online and attracting further patients. It is important to note that the currently active visualization will be exported.
Export Button:

3. Contact
For any further questions or feedback feel free to contact us under info@aemos.at. We look forward to getting in touch with you.